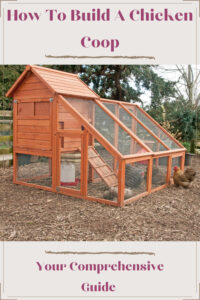
How To Build A Chicken Coop – A Comprehensive Guide
So, you’ve got a “hanker’n” to raise chickens and need a coop?
Before running out to the local lumber store and buying materials all willy-nilly, you’ve got to have a plan. If you don’t, you’ll end up wasting money and time and possibly redoing the whole thing over. Let’s approach this project step by step to show you how to build a chicken coop.
Come on, we need to get a coop built for those birds!
Building vs. Buying
It goes without saying that building your own coop gives you satisfaction and a sense of accomplishment. However, if you aren’t a DIY’er, don’t have the time, or just not a “carpenter-type” person, buying is the best option for you.
Budget
How much do you want to spend (total) on a coop? Setting a budget is a necessity unless you have an endless supply of coins. To give you an idea of what the differences are between buying and building, we’ve made a comparison of trending pre-built coops vs. traditionally built coops. Learning how to build a chicken coop cheap comes with planning based on a set amount of money you want to spend.
Pre-Built (Purchased)
Median Cost: $650
- A-Frame: $200-$300
- Portable: $300-$500
- Walk-In: $300-$1,000
- Coop+Run: $1,000-$3,000
Kits (Purchased)
Median Costs
- Small: $197
- Medium: $373
- Large/XL: $1,395
Traditional Build (from scratch)
You can’t put a price on a home-built coop because of numerous variables such as materials you choose to use and how fancy you get.
Median Cost of Woods
- Pine, Fir, Cedar, Maple: $2-3/ft
- Pressure-Treated: $7-$10/ft
- Redwood, Plywood: $10-$20/sheet
Median Cost of Other Materials
- PVC: $5-6/ft
- Corrugated Metal: $15-$20/sheet
- Corrugated Plastic: $25-$30/sheet
- Mesh: $30-$40/roll
- Roof Material: $7-9/sq ft
- Wire: $40/roll
- Concrete: $110/cubic yd
Plans
- Free (downloadable PDF s)
- Paid (books, blueprints, downloadable PDF s): $20-$200
Enhancements
- Nesting Boxes: $15-$29 per box
- Roost: $0-$10
- Ladder: $10-$100
- Bedding/Straw: $25-$100
- Feeder: $15-$100
- Waterer: $15-$89
- Heater: $30-$150
- Fan: $20-$200
- Mister: $10-$50
Time
Pre-Built (Purchased)
Costs the most but it saves time and labor.
Total Estimated Time: 2-3 hours
- 1 hour to choose a coop and order
- A few minutes to decide on a location
- Delivery/Pickup
- 1 hour to choose and order waterer, feeder, and bedding.
Kits (Purchased)
Costs more, but it saves time and requires less labor. Typically comes with nesting box(es,) roost, and ladder.
Total Estimated Time: 1 Day
- A few minutes to decide on a location
- 1 hour to choose a coop and order.
- 1 hour to choose and order waterer, feeder, and bedding.
- Delivery/Pickup
- Assembly that can take 2+ hours
Traditional Build (from scratch)
Costs are comparable to pre-built or kits. If you repurpose materials, it will cost you very little. Coops that are built from scratch last much longer.
Total Estimated Time: 3-4 Weekends
- 1 day to plan and decide on a location
- If pouring a concrete foundation, this can take 1 weekend to prepare the site and pour the concrete.
- 1 Weekend to purchase materials
- 1-3 Weekends to build depending on complexity and size
- 1 day to order nesting boxes, waterer, feeder, bedding.
Size
An easy way to remember how big of a coop you’ll need is by using a simple formula.
For every single bantam
- Coop: minimum of 4 sq ft
- Run: minimum of 2 sq ft
For all other chickens (single)
- Coop: minimum of 10 sq ft
- Run: minimum of 4 sq ft

Benefits of Building Your Own Coop
There are a lot of variables to consider whether you’re building or buying a chicken coop. There are advantages and disadvantages of both.
Premanufactured vs. Self Built Coops
Pre-built and kit coops tend to be comprised of cheaper materials as compared to a DIY build. Mass production is typically done with pressed woods, plastic, and lightweight metal. When you build your own coop, you have more control over the materials that go into building it. Therefore, you are more prone to choose quality materials, whereas retail pre-made/kit coops are about quantity.
When building your own coop, there are numerous benefits during pre-build, build, and post-build.
- You and the whole family can make this a fun project. The planning phase is exciting and gets everyone pumped for the task as a whole. It also provides a goal to work for because, in the end, you all know that you get to enjoy the chickens and for kids, collecting the eggs is fun.
- Assign everyone a task during the building phase. Kids love to hammer and help. A team-oriented project builds family unity while teaching children some valuable skills in being self-sustainable. Doing some outdoor activities like this keeps everyone active, which does both the body and mind good.
- Once you have the coop complete, now comes the best part, and that’s getting your chickens!
We review some less expensive chicken coops here, and some higher end coops here.
Things to Consider Before Building
As with all projects we undertake, forethought and planning prevent potential loss in your investment of time and money.
Your Local Zoning Law
It doesn’t make sense to put hundreds of dollars of your money into building a chicken coop to find out your local zoning laws won’t allow chickens much less a coop.
- Some zones within city limits won’t allow chickens.
- If chickens are allowed, there may be limitations.
- The maximum allowable number of chickens.
- Some zones limit the number of chickens per acre.
- Roosters may be prohibited.
- Chickens may not be allowed to free-range.
- Placement of coops may have requirements.
- Neighbor authorizations may be required.
- A permit may be required for building a coop.
Providing you have a “green light” with regard to zoning laws and any poultry ordinances in your area, you can move forward with no worries.

Size of flock
If you are outside of city limits and have the freedom to have a hefty-sized flock, go for it! However, in a more urban environment, you’ll incur limitations in how many chickens you can have. Again, your local zoning law dictates that number.
When it comes to building a coop, the first thing to consider is the number of chickens you plan to have.
We’ve provided a few coop sizes below with the number of chickens each will hold.
- 4 square feet per regular-size chicken
- 3 square feet per bantam
A-Frame Coops
| 6 ft W x 8 ft L (48 sq ft) | 12 chickens or 16 bantams |
| 6 ft W x 10 ft L (60 sq ft) | 15 chickens or 20 bantams |
| 8 ft W x 10 ft L (80 sq ft) | 20 chickens or 26 bantams |
Rectangle and Square Coops
| 40 in W x 40 in L (11 sq ft) | 2 chicken or 3 bantams |
| 76 in W x 32 in L (16 sq ft) | 4 chickens or 5 bantams |
| 3 ½ ft W x 3 ft L (10 sq ft) | 2 chickens or 3 bantams |
| 6 ft W x 6 ft L (36 sq ft) | 9 chickens or 12 bantams |
| 6 ft W x 8 ft L (48 sq ft) | 12 chickens or 16 bantams |
| 10 ft W x 12 ft L (120 sq ft) | 30 chickens or 40 bantams |
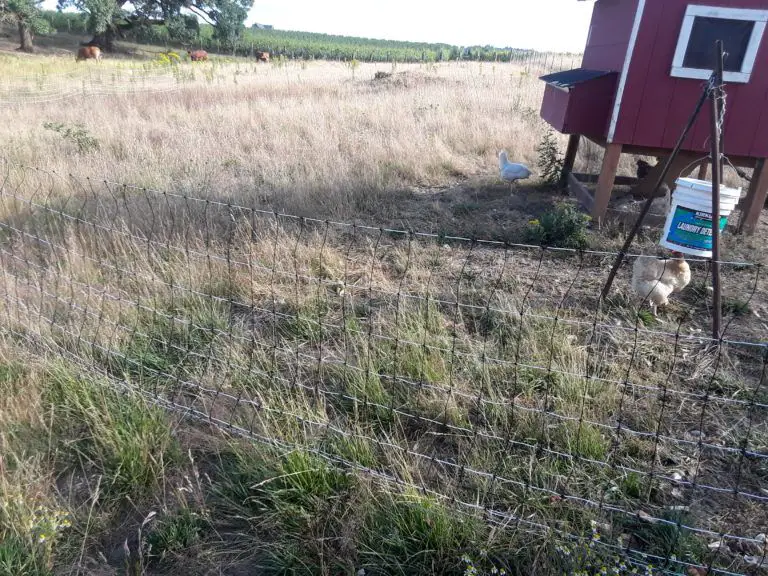
Location
We can’t stress enough about how crucial it is to be very selective where you place your coop. Your coop should face the south to ensure it gets enough sun during the winter. If you happen to live in a climate where the wind is an issue, south-facing coops may have to contend with the wind. Installing a windbreak helps to alleviate this. More on coop placement can be found here.
Coop Location Do’s and Don’ts
DO
- Follow placement regulations if required by zoning laws.
- Place facing the south.
- Provide a windbreak if necessary.
- Place near water faucet to be able to clean the coop, provide water for drinking, and to set up a mister on hot days.
- Place near electrical hookup to have lighting, heat, and ventilation.
- Place far enough away from your house to keep odor and insects at bay, but within eyesight in case predators attack.
- Place in an area that has enough room to add a run.
- Place in an elevated area to prevent flooding or pooling of water.
- Place it near trees for shade on hot days.
DON’T
- Avoid placing in a low-lying area because of the risks of flooding.
- Avoid putting the coop next to your house.
- Avoid placing the coop next to a fence. Predators such as cats, possums, and raccoons will be more apt to attack.

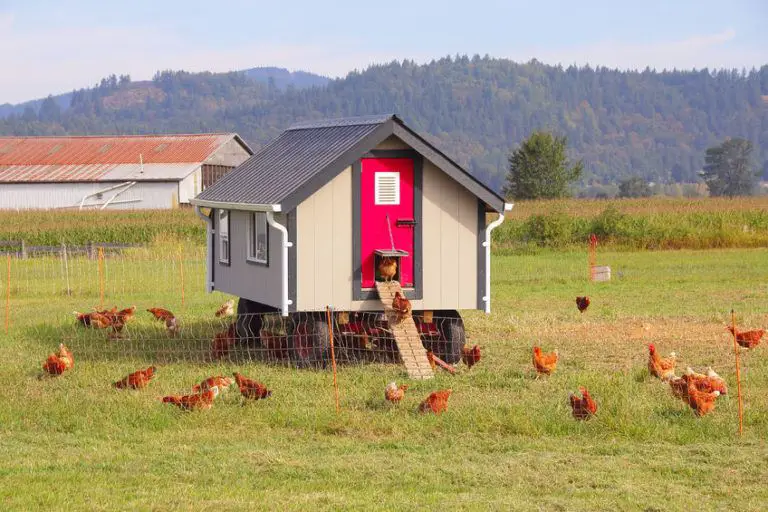
Portable vs. Stationary
Before building a coop, you should decide whether you want your coop stationary or portable.
Portable
- Provides chickens variety in environment and access to insects each time it’s moved.
- Doesn’t have heat and ventilation as a stationary coop has.
- More prone to predator’s lifting it up to get to your chickens.
- Lacks proper insulation and protection from harsh winters and hot summers.
- If you have backyard chickens, you are limited in space for repositionings.
Stationary/Permanent
- Much more durable than a portable coop.
- Offers more protection from the weather and predators.
- Has electric access for heat and ventilation.
Climate
When building a coop, your climate should play a role in ensuring that your chickens will have adequate warmth in the winter and relief from the summer’s heat. If you live in the northern regions, winters can be downright brutal. Your coop should be well-insulated and have the appropriate bedding to keep your chooks warm.
Likewise, if you live in the south where summers beat the very energy out of you, then it’s vital your coop has a fan and proper ventilation. Shade trees are an important element in keeping your coop cool as well.
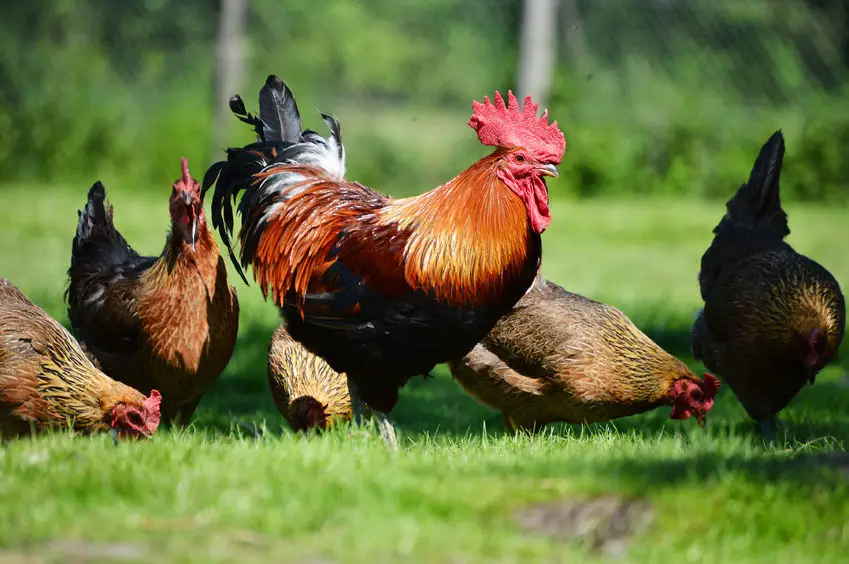
Local Predators
We all have region-specific predators to contend with when it comes to having chickens. When building a coop, keep those pesky dangers in mind. Bears, raccoons, and possums can open and lift things.
- Coyote
- Fox
- Raccoon
- Bear
- Cat
- Dog
- Possum
- Hawk
- Owl
- Rat
- Bobcat
- Weasel
- Skunk
- Snake
Must-Haves in Your Coop
Once you have your coop well on its way, don’t forget to include a few necessities.
Nesting Boxes
Getting creative in making your nesting boxes is actually fun. There are numerous things you can use or repurpose.
- Empty kitty litter buckets
- Milk crates
- Cat litter pans
- 5-gallon buckets
- Old metal mailboxes
- Endless ideas
Plans to Build Nesting Boxes
- Trio nesting box with an outside access lid.
- Stackable quad nesting box
Roost
There are hundreds of ideas to make a roost inside your coop. Depending on the size of your coop, you can make a roost from almost anything, including a tree branch or piece of scrap wood.
Feeder and Waterer
Feeders range in size and price. You can craft a pretty nifty bulk feeder from a trash can and some PVC piping!
Waterers also vary in price range and in size. If you want to DIY a waterer, there are some creative ways to make one.
Ventilation and Heating
Box fans can be positioned in a coop by various devices. Installing ventilation during your build can also help larger coops. Things such as windows, gable vents, and doorways provide cooling on hot days and allow any trapped ammonia odor to escape.
During the bitter winters, heating is vital for your coop. A portable panel heater is ideal for a medium to large coop as well as a hanging heater. For smaller coops, the use of a heating mat or small heater should suffice.
Insulation
Your insulation requirements will vary according to the climate you live in. Frigid temps of winter can easily cause frostbite in chickens, so it’s essential to insulate your coop. You can use different types of insulation, but remember, if you don’t use wall covering inside the coop, your chickens will peck at the insulation. Expose styrofoam, spray foam, and fiberglass insulation are going to be destroyed by your chickens. You can place interior wallboard up far enough so the chickens won’t get to it.
Just make sure to provide adequate ventilation! Without it, your flock could get sick.
Roof
The best materials to use for a roof is asphalt shingles. This insulates and protects your coop and your chickens. Exposed wood is never recommended because of rotting from the rain, snow, or ice. Damp wood encourages the growth of mold, which is definitely something you don’t want in a coop. More on roofing choices for your coop can be found here.
Walk-in Entrance
The entrance to your coop where the chickens will enter and exit should only be large enough for them to get through. However, for the sake of you getting in and out of the coop to clean, an access door should be included. Don’t forget that although the entranceway for the chickens is small, you need to also ensure that the coop gets adequate ventilation from windows or an access door. Lastly, don’t forget to provide your chickens a ladder or ramp to get up into the coop.
Protection against Predators and Pests
We have listed a few important items to include when building and securing your coop.
- Secure skirting with either wire or something that is weighted down.
- Secure fascia board and overhang protection.
- If your chickens free-range, an automatic entrance door is perfect. It operates on a sensor that detects darkness. As the sun sets, the door closes, protecting your chickens from predators and opens again at sunrise.

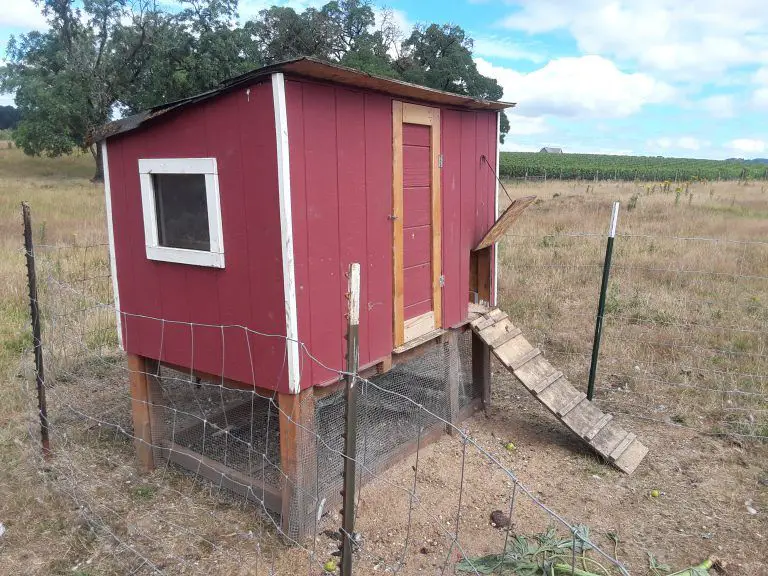
A Step-by-Step Guide in Building a Simple Coop
Tools and Items You’ll Need
- Gloves
- Protective Eyewear
- Tape Measure
- Circular Saw
- Hammer
- Drill
- Level
- Speed Square
- Metal Cutters (tin snips)
- Extension Cord for Power Tools
- Garbage Can
- Saw Horses
- Pencil or Marker
A Visual Guide on Building a Coop From Start to Finish
Small Coop
Medium – Large Coop
Hosted by Simple Suburban Living Dad
Building Plans for Chicken Coops
We have scoured the internet for a wide range of coops based on sizes and skill levels, and found a varied assortment.
Free Chicken Coop Plans
Beginner Skills
- Skill Level: Easy
Capacity: 1 chicken or 2 bantams
http://www.simplyeasydiy.com/2014/06/diy-small-backyard-chicken-coop.html
- Skill Level: Easy
Capacity: 3-4 chickens
Run Only
4×8 Run https://www.construct101.com/chicken-coop-run-plans/
Experienced Skills
- Skill Level: Intermediate
Capacity: 3-5 chickens
- Skill Level: Intermediate
Capacity: 8 chickens
4×8 Coop with 8×10 Run https://www.construct101.com/8×10-chicken-coop-plans/
- Skill Level: Intermediate
Capacity: 4 chickens
4×8 Coop with basement run https://www.construct101.com/4×8-chicken-coop-plans/
- Skill Level: Intermediate
Capacity: 8-10 chickens
8×8 Coop with run https://www.construct101.com/large-chicken-coop-plans-step-step/
Advanced Skills
- Skill Level: Expert
Capacity: commercial size
Paid Chicken Coop Plans
- Skill Level: Easy to Intermediate
Amy Wilkerson’s 8×20 Coop and Run
Capacity: about 8 chickens
Part 1: https://www.youtube.com/watch?v=yS_hULBuygY
Part 2: https://www.youtube.com/watch?v=U9IB3Ajsibw
Part 3: https://www.youtube.com/watch?v=Fhw-RAypJAk
- Skill Level: Easy
“Home, Garden, Design, Plan” 3×10 Coop and Run
Capacity: 3 chickens
- Skill Level: Easy to Intermediate
“Home, Garden, Design, Plan” 24×12 Coop and Run
Capacity: 60 chickens
- Skill Level: Variety
Books to Browse with Plans
Ways to “Spiff” up Your Coop
Once your coop is finished, you can decorize it to reflect your personality. Make it fun, flirty, and entertaining! We have a lot of great ideas for you. Since your chooks don’t care too much about you dressing them up to show them off, why not dress up that coop and make it a conversation centerpiece for family cookouts or events?
The Last “Cluck”
We sincerely hope you at least have some insight on how to build a chicken coop. Perhaps one of our above-mentioned designs caught your eye. Whatever you decide to build, even if it’s from a kit, we wish you the very best. Please don’t hesitate to share your pics with us once you’re done with your coop!
Happy “chickening!”
Like this post? Pin it