
Top Ten New And DIY Chick Brooder Ideas – A Comprehensive Guide For Getting Your Peeps Off To A Good Start
Raising a few chicks is easy right? Buy ’em at the farm store or online, put them in your chicken coop with food and water and your done…right? Not exactly.
When you first get your chicks home, they need some added care that grown chickens don’t, like warmth, safety, and the right kind of supplies that work best for chicks.
One of the items needed is a Brooder. A brooder is essentially a contained space for your baby chicks to stay warm and safe while they grow. Add to your brooder some chick feeders and waterers, some bedding, and a heat lamp and THEN you’re ready to go!
Rest assured it’s not difficult to set up a brooder for your new feathered flock. In fact, it’s pretty darn fun. We have kids and they help us so it becomes a fun family experience.
In this article, we’ll take a look at supplies needed to get your chicken brooder up and running, along with a full assortment of chick brooder ideas for you to consider. Feel free to jump around to what you’re looking for
For a complete guide to setting up your coop, check out the rest of this website or see this guide.
- Definition
- Size Requirements Of A Brooder
- How Long Do Chicks Need To Be In A Brooder?
- Chick Brooder Heat Source
- Ideal Temperature For A Chick Brooder
- Types Of Brooders
- Other Tips
- Conclusion
Definition
According to Dictionary website, the technical definition of a Brooder is: “a device or structure for the rearing of young chickens or other birds.”
This is a rather broad description, which means that ANY structure that provides an area to rear chicks will do…so we’ll take a look at a few of the more common brooders, along with some that are a bit atypical.
Size Requirements Of A Brooder
A good way to estimate the size of your brooder is to figure 1/2 square foot per chick for the first month (4 weeks) of life. For the following month (4-8 weeks), you’ll need 1 square foot per chick. After 8 weeks, you should be able to transition them to the chicken coop.
In our experience, bigger is better since it can give your peeps more room to roam. But they rarely get too far from the heat source so if you have a smaller brooder to start off with, it should be fine.
How Long Do Chicks Need To Be In A Brooder?
This can depend on how fast your chicks grow but, generally speaking, around 2 months is plenty. You’ll want to make sure they have a few adult feathers for warmth before transitioning.
When we transition our chicks from the brooder to the coop, we will add the heat lamp to the coop for awhile, but position it much higher since they are not as reliant on it at that point.
If you live in a warm climate, you may not need to add any additional heat to your coop when the transition is made. But if you live in a colder climate, you may want to consider having the heat lamp on at least for another 2 weeks or more until those feathers are in and they can stay naturally warm.
What we’ve done with our flocks is release them into the coop after about 3-4 weeks. By then they are old enough to be less reliant on the heat source.
But since we get our chicks in the spring, it’s still pretty chilly outside. So we make sure the coop is secured shut so they stay warm enough but can’t get outside.
We also hook up our heat lamps in a corner so they can still huddle underneath them for warmth as needed.
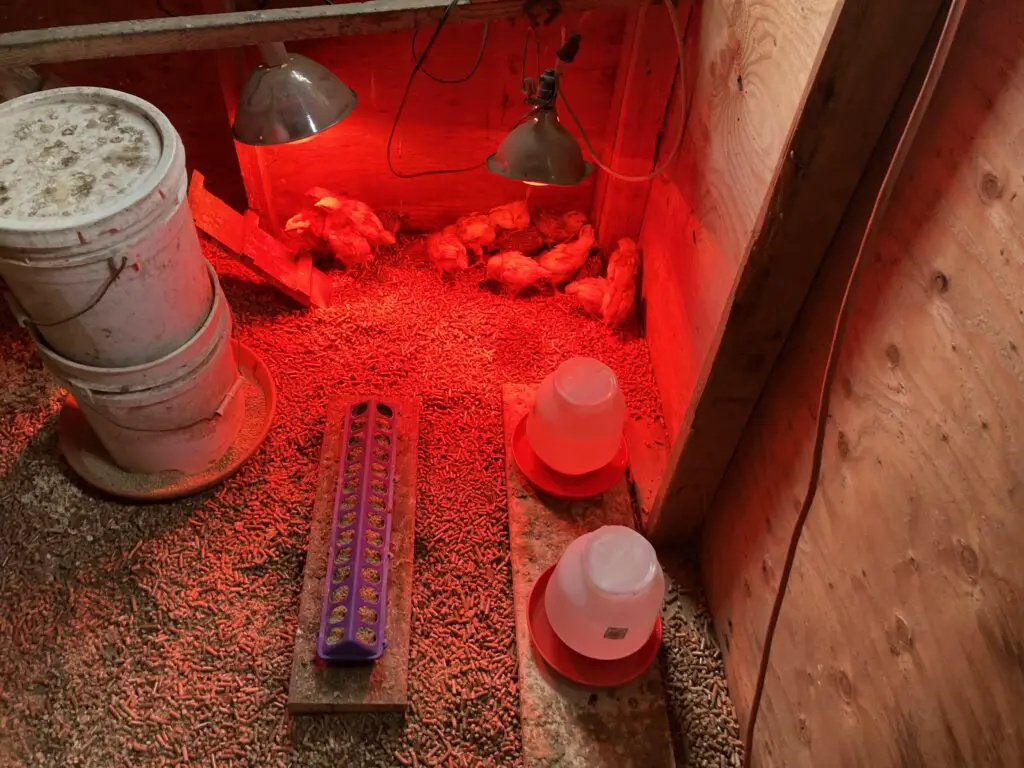
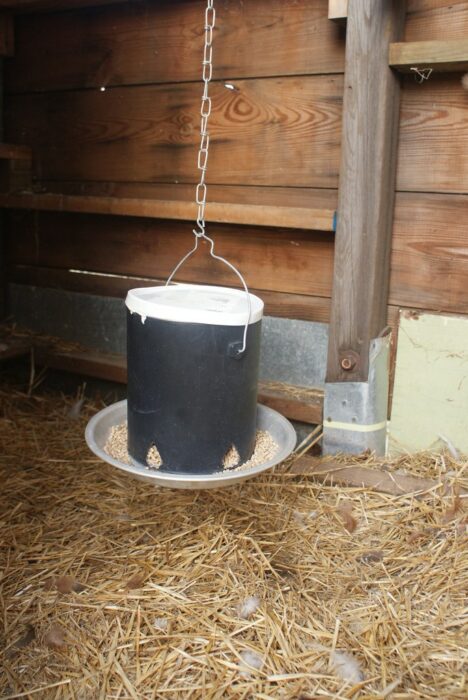
Below is a picture of our chicks just released into the coop. The adult feeder is there (the large double stacked bucket feeder), along with their (purple) chick feeder as they start the transition. They love having the extra freedom!
Chick Brooder Heat Source
Once you determine what type of brooder you’ll be using, it’s time to add some heat! The chicks can create a lot of their own natural warmth by cuddling up next to each other, but they’ll need an additional heat source for the first few weeks.
There are many ways to heat your new little peepers, but we’ll show two of the most common heat sources used today.
Brooder Heat Bulb
We’ve used brooder heat bulbs for many years (and still do) and they’ve always worked great! Nothing fancy but it gets the job done. They are cheaper than heat trays as well.

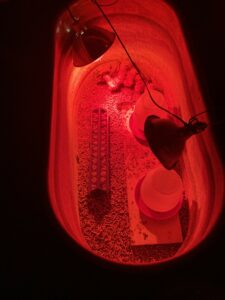
Below is our tank brooder with two heat lamps.
Heat Trays
These are newer and becoming very popular. They heat the brooder evenly, and are less of a fire hazard than heat bulbs. They’re also easy to adjust, which is a huge bonus!
If we decide to upgrade in the future, we may get one of these beauties!

Ideal Temperature For A Chick Brooder
An ideal temp is between 90 – 95 degrees (F) or 35 (C). We don’t use a thermometer in our brooder and simply gauge the temperature based on the chicks behavior.
Determining Chick Comfort Level
Too Cold: If the brood is tightly huddled into a group right under the heat lamp or tray, it’s a bit chilly for them and more heat should be added. Check the height of the heat source (the heat bulb, heat tray, or whatever heat source you’re using). If it’s positioned too high, simply lower it a few inches (2-3 inches at a time).
Too Hot: You don’t want to cook your chicks either! If you see them scattered widely apart from one another, far away from the heat source, or panting, it’s time to raise the heat source a few inches. We estimate moving it up around 2-3 inches.
Chicks ‘Happy Place‘: To know if you’ve nailed the right temperature, your chicks should be under or near the edge of the heat source and walking around comfortably all over the brooder. The spacing of the chicks will be just a few inches apart with some huddling still going on.
Types Of Brooders
Options galore! Yes, there are likely dozens of items out there that can be used as a chick brooder. We’ll focus on a few of the more common options below.
Cardboard Box Brooder
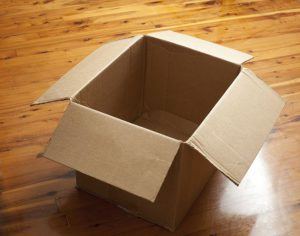
Until this year, we used a cardboard box for over a decade and it’s worked great! Yes we know, not real high tech. But however hokey it sounds, we found that a large box is all we ever needed. The best part? It’s FREE!
An ideal cardboard brooder box is a refrigerator box – the length, width, height etc. is ideal for raising several chicks. However, we don’t always have access to one of these so we improvise.
We went to a few local hardware or retail stores and ask if they have any large recycled boxes. Without exception, they are happy to get rid of them and help a potential customer along the way.
We find around 2 or 3 (or more) of the largest boxes they have. If you don’t already have any, you may want to grab a roll of duct tape as well.
When we get the boxes home, we position them side by side and tape them together. Then where the two sides of the boxes are butted up against one another, we cut that section out with a utility knife or heavy duty scissors, leaving a nice large opening between the two boxes that they can come and go.
After that, we add wood pellets bedding (about an inch thick is great), put in the chick waterers, feeders, and heat lamp and that’s it – our brooder set up is ready!
After we transition our chickens to the coop, we throw the box away or use it in our garden to suppress weeds. If you want something more durable, keep reading.
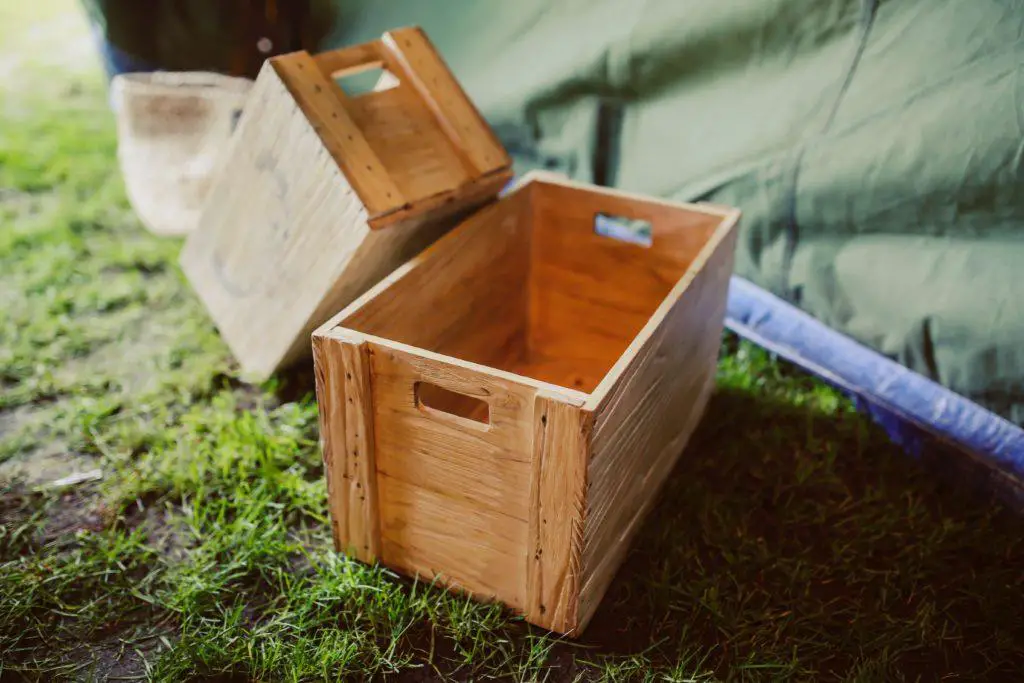
Wooden Box
This is one the simplest, yet most durable options out there. It can be made out of plywood and some 2×2 or 2×4 framing at the corners. What’s great about a wood brooder is that you can custom make it to the size needed.
To determine the size, reference the size requirements again to determine how much space is needed…1/2 square foot per chick for first month, 1 square foot per chick for the second month.
For example, if you’re getting 6 chicks, estimate that they’ll need 3 square feet for the first month and 6 square feet for the second month.
Unless you want to build two brooders, simply build it for 6 square feet. Some possible dimensions of this example brooder could be 2 ft x 3 ft. (or 2×3 = 6)
If your not familiar…to estimate square footage, multiply length by width. In the above example, that is 2 ft x 3 ft = 6, or 2×3=6.
As for the height of the sides, make them over 15 inches tall but not much over 30 inches or it’ll be hard to access the feed and water containers.
Plastic Tote
This is an AWESOME idea. It may not be free…but it’s certainly not too pricey either! You may even have one taking up space in the attic somewhere.
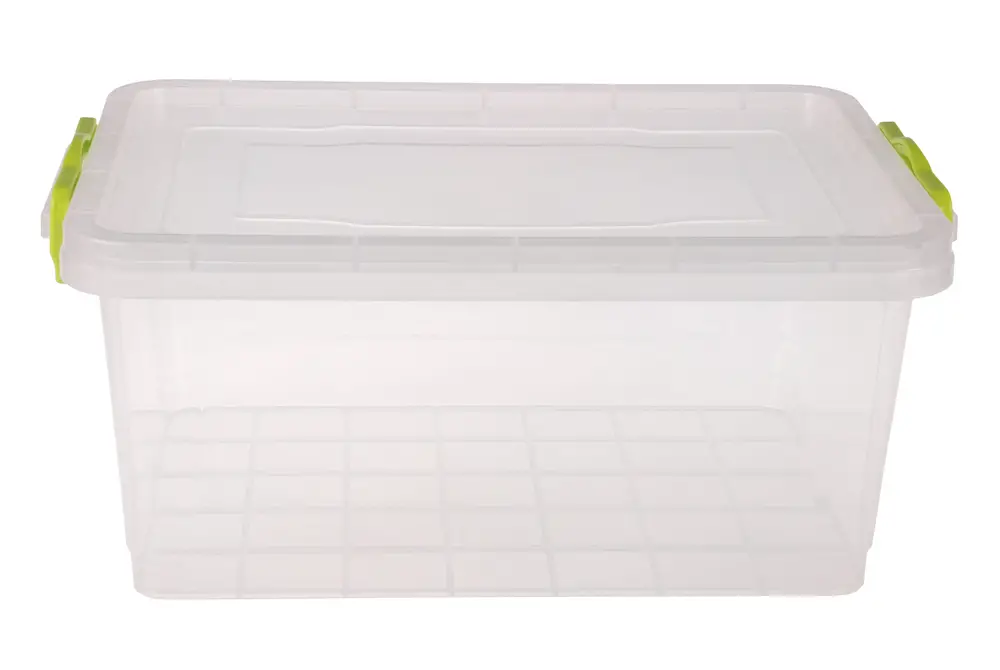
The beauty of a tote is that they can be washed and re-used again the following year without a lot hassle. Whether you can use this or not will depend on how many chicks you’re getting.
Again – measure the height and width of your tote to see if it’ll work for the number of chicks you are planning to get.
*Perhaps this goes without saying, but just in case…keep the lid off the tote! Either drill holes in the top for ventilation or use a different lid like a piece of hardware cloth (which is commonly used.)
Kiddie Pool
This is another brilliant option that won’t break the bank! We have considered trying this option before but shied away from it because the sides are a bit too low for our liking.
As the chicks start to get older – around the second month, they will start flying a bit, sometimes getting a little elevation too. You don’t want them to be able to fly out with the potential of dying in the cold or getting eaten by a cat, dog, or other predator.

A simple solution is to place a top on it. Time to get that hardware cloth out!
But there are other ideas too, like placing a half sheet of plywood with a few holes in it, or anything that would prevent them from flying over but still allow them plenty of ventilation.
Aquarium or Terrarium
These are also really cool structures that can easily be cleaned once the chicks have been transferred over to the coop. Not only that, your chicks will be easily seen through the glass.
The structure is rigid on all sides as well, which makes it perfect for attaching your heat lamp to.
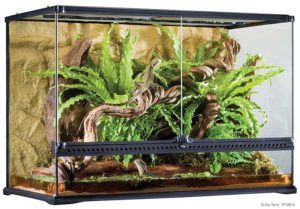
The price of these can be a bit steep, but you may be able to find some sweet deals on one from Craigslist, Offerup, or similar sites. I’ve seen them there for free sometimes. If you want to buy one online, there are dozens of options (maybe hundreds!).
Stock Tank
A stock tank is used as a water container for larger livestock like cows, sheep, horses and the like. It also makes a great brooder. Nothing will take it down, and it’s easy to access the chicks, take care of daily maintenance, cleaning etc.
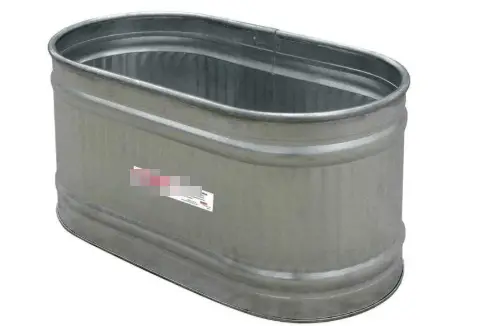
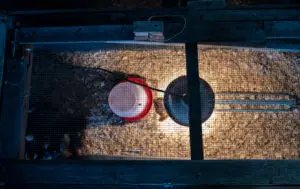
Update 2023: We went with a stock tank brooder as shown in the picture below. We didn’t get cattle this year so it fit the bill perfectly for chicks!
Our new brood of 15 chicks are in it now and loving it. It’s not the largest brooder for that many chicks so it will be a very short term home.
We love how easy it is to use and set up with brooder lights and all the other accessories. The lights we use can simply clamp onto the side of the tank, but we chose to attach them to the roost and coop studs instead for this arrangement.
The sides are high enough that it isn’t easy for the chicks to fly over the sides when they start taking flight. Having said that, we still put a cover over it just to make sure!
If you don’t own one already, expect to pay a bit more for one (or more) of these. But if you plan to keep it around for many years it will be a great investment.
Not only that, if you stop raising chicks, you can use it for other farm animals or simply sell it! They hold their value quite well.
To save some a few bucks, buy one used off Craigslist or OfferUp. Or get one new at your local farm store or online.
Dog Crate
Another possibility but, because they have an enclosed top, it’s a bit harder to put a heat lamp, water and food supplies inside. I wouldn’t necessarily rule it out, though. If it’s all you have it can totally work!

Many people use a large dog crate as their brooder. It can work well if you have just a few chicks. They’re easy to clean too – just wash them out when the chicks move into the coop.
I have a feeling Fido won’t mind you borrowing his crate for a month or two, and that’s all the time you’ll need! Examples of these and other ideas can be found here.
Buying A Brooder Online
If the above ideas don’t really seem feasible for you, you can always buy a brooder at your local farm store or online.
In fact, entire brooder kits with accessories can be ordered online. You pay for that convenience but time is important so it may be well worth it!

As in the product above, brooder kits include the brooder, heat lamp, waterer, and feeder – basically everything you need to get going.
The kits I’ve seen advertised on Amazon seem to be sufficient for smaller flocks. You can buy just the brooder or the entire kit.
Make A Brooder Inside Your Coop
Although the previous options will work great, you can also abandon the idea of making or buying a brooder and simply partition off a corner of your existing coop. That way when they are ready to be released into the coop, it doesn’t take much work to dismantle it at all!
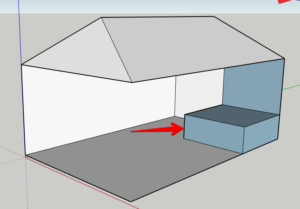
To make an in-coop brooder, you simply add two sides to meet together in a corner of the coop. Think of it like adding a mini coop inside your larger one.
This type of set up will provide successful containment, and can be made out of a sheet of plywood and a few 2×4’s for the corners.
This may not be a viable option if you have a small coop, but is something to consider if you have a larger one!
Buy Another Small Coop
I know, it seems weird and a bit excessive to buy another coop to use as a brooder! But there are folks out there doing this. You can buy an inexpensive coop kit online or at your local farm store and use it solely as a brooder for your chicks.

They’re easy to set up with all the necessary accessories, and can be used every time you get chicks. It can also be used for your adult hens if you have a broody hen and want to try hatching some eggs!
Obviously the upfront cost will be higher and you’ll have to find a place to store it when not in use. We discuss many cheaper coops (under $200) here.
Other Tips
Once you’ve picked out the kind of brooder you want, there are a few things that are helpful when setting it up.
- Add A Top – Depending on where you place your brooder, consider adding a top or lid on it. This will protect your chicks from predators and prevent the chicks from flying out when they get a bit older.
- Elevate The Feeder And Waterer – This is also optional, but I put a 2×6 board (or similar) on top of the bedding, and then put my feeder and waterer on top of it. Even at at young age, the little chickens can make a mess in the water and feed so having it slightly elevated off the bedding can help. Just be careful not to place it too high, since they are so tiny! We observe ours to make sure they can eat and drink comfortably and make height adjustments as needed.
- Consider Using A Standing Lamp To Clamp Your Heat Bulb To – The chicks will need less heat as they get older so the heat bulb can be moved up an inch or two every few days. By having standing lamp either inside the brooder box, or right next to it on the outside, you can easily adjust the height every so often.
- If you don’t want to use a lamp, they make height adjusters for this very purpose, and these can be bought online.
- Also – you can also get creative with lumber and build a similar stand at a fraction of the cost!
Conclusion
I hope you’ve picked up a few ideas here today. Just know that the list is by no means exhaustive. Anything large enough to hold chicks can work as a brooder, so get creative!
We found a great forum that shows what other chicken keepers have used. Many of the ideas discussed above are shown there!
If there is something you’ve used as a brooder that isn’t listed here, please let us know by adding a comment below. We can all learn from each other.
Thanks for stopping by and happy chickening!


What a fun and informative article on brooders! I had to laugh at the simplicity of the cardboard boxes and duct tape,it actually brought back memories of how my grandparents did it when I was a kid. Later we did switch to a more durable wooden brooder that we all made by ourselves. Such a simple but very necessary addition to any chicken coop.
Thanks for your comment Kathy – yeah we’ve found a simple cardboard box does the job nicely as a brooder…but the kids are getting older now and so we may take things up a notch and either make or buy a more “serious” brooder one of these days:)
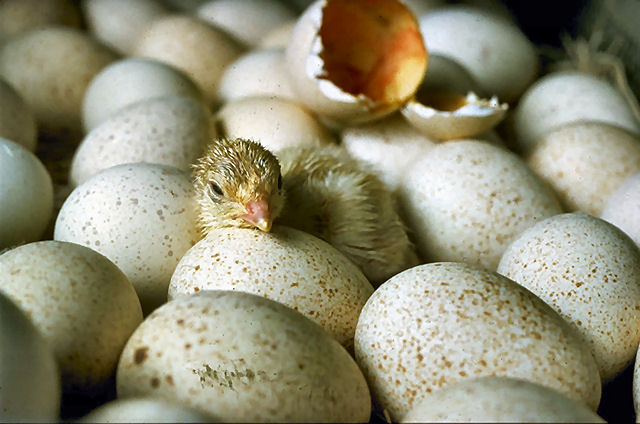
Interesting site regarding chicken brooding. I like the way you laid everything out step-by-step from the time of of birth in the brooder until the chickens are strong enough to get along. As I read this information, my mind went way back to my young school days. My teacher would take us to the field museum in Chicago. It was a section there where we all watched baby chicks being hatched, Some were all the way out of their shell, some eggs just starting to crack, and some still incubating. It was an very interesting sight as it always is every year we go. Your sight wa very interesting and educational for readers not understanding the birth of chicks and the process.
Thanks so much for your comments! I love watching chicks hatch too – it’s an incredible sight! Best wishes to you.