
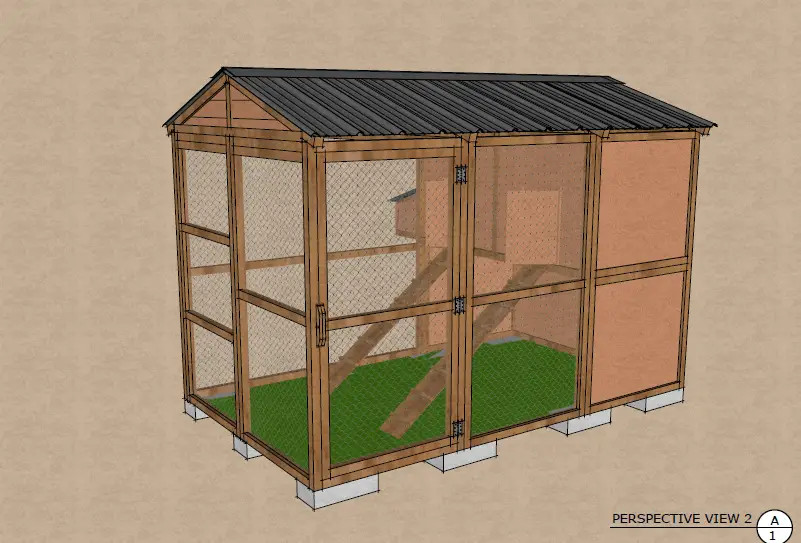
The next coop is a more traditional coop and run design. It’s a free 6×10 chicken coop plan with an attached run.
As with each design, the coop’s dimensions can be scaled up or down depending on how many chickens you plan on housing!
This coop can house up to 9 chickens, although that would be allowing them 2 sf of space in the coop. The coop’s run adds an additional 10×6 enclosed space so. If we base number of chickens on run square footage alone, it’d come down to 6 total chickens.
However, if you decide to free range your flock and keep the run door open all day, you can easily hold 9 chickens or more, if you add enough roost space.
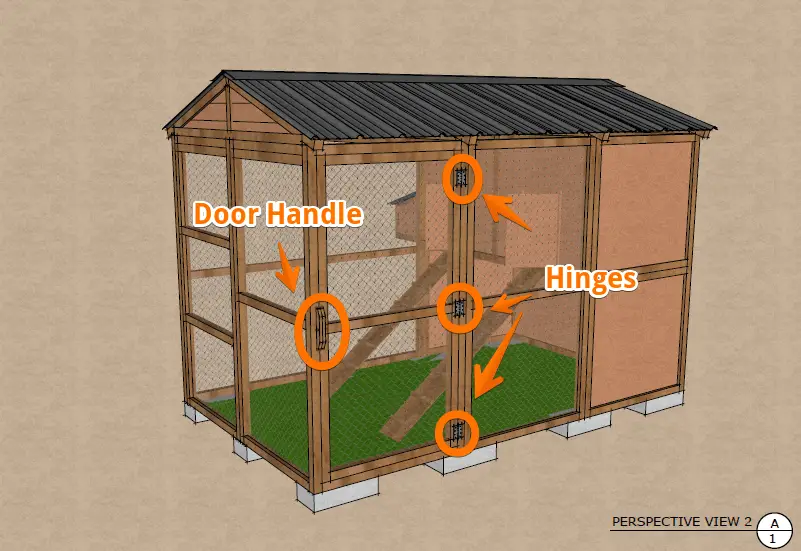
Here is the plan, available in PDF. We like printing it out so it’s handy during the building process. We noticed this version did not have an entrance door to the run so we were able to get the designer to add it. It’s included in the next section. Sorry for this oversight! Outside of that blip, the plan in the PDF seems to be complete and ready to build.
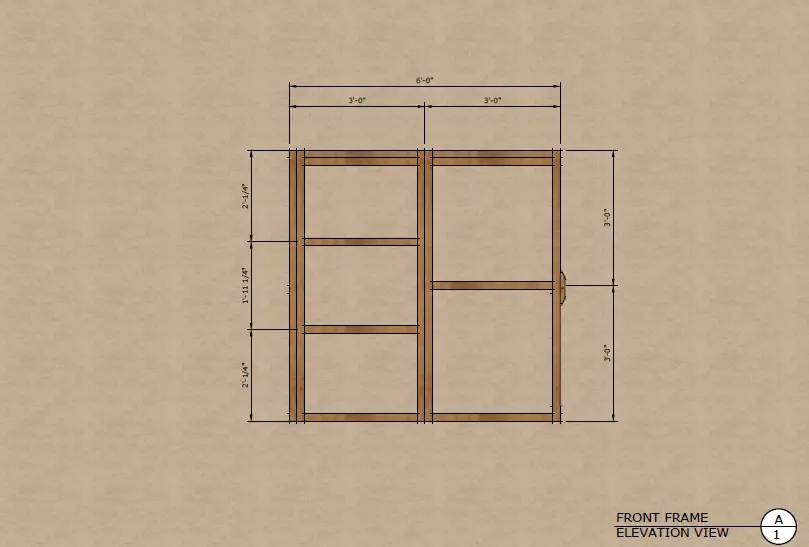
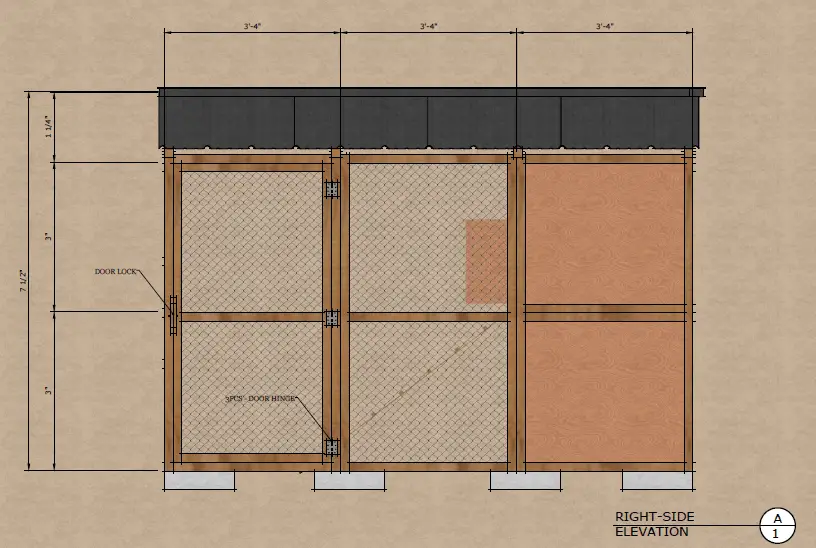
This above PDF does not show the door of the run, so we’ve been able to add it below. It shows the placement of the door, the hinges, dimensions of the door, and several side views.
Ideas For Modifications (optional)
This plan provides a great deal of detail but there are many ways a design can be modified to better suit your particular needs. For information on how to set up your coop, see this guide.
The following ideas are really just that. Ideas. As you look at the plan (or any plan for that matter), you’ll be able to start thinking of ways to alter the design for your flock. For example, if this plan seems to have the look you’d like but the run seems too small, additional length can easily be added to it.
Disclaimer : We do not even pretend to be carpenters! Like you, we are chicken loving enthusiasts who enjoy talking about chickens and building coops. We’ve built our own coop from scratch and loved doing it. We wanted to share our knowledge along the way in the free plans we find, and in our blog on raising chickens.
So just know that the plan may not be perfect. There are many of you who could likely design and build better coops. But we hope the plan provides enough detail to build a gorgeous coop for your chickens. And remember…it’s free!?
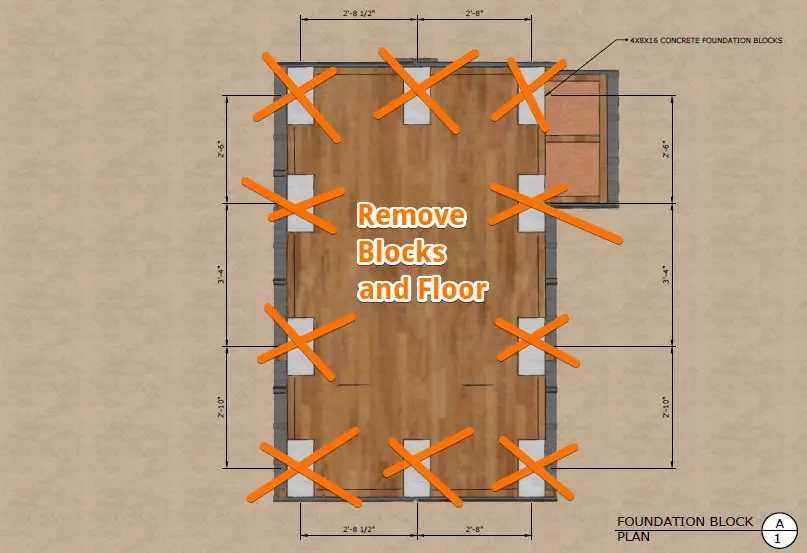
Remove Floor and Blocks
The design shows this coop on large cement blocks, and built with plywood flooring. If you don’t plan to have your chickens running outside the run or don’t want to tear up the grass below the coop, this is fine.
However, it can save a lot of time and money to simply eliminate the floor and foundation blocks altogether. The plan can be made as it’s shown without the blocks and floor, leaving it to rest on the grass where the flock can pick at the bugs, seeds, grass, and be chickens.
Again, it’s really a matter of personal preference.
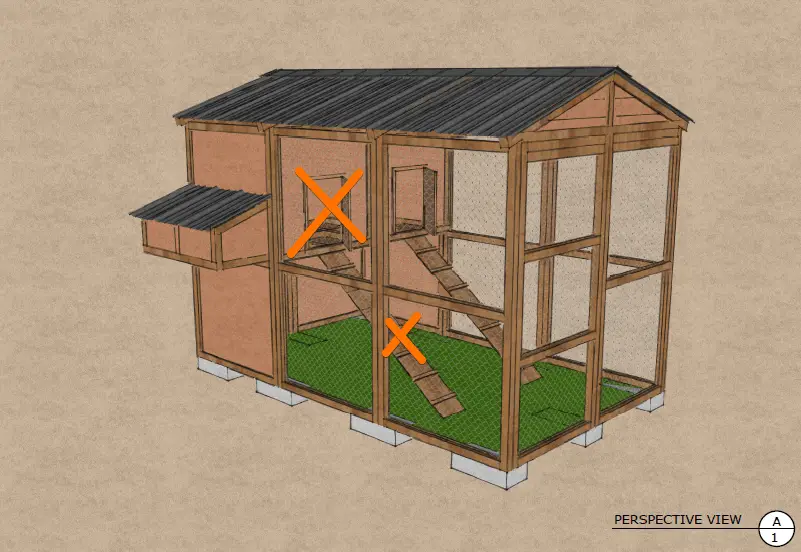
Remove One Pop Door And Ladder
The two pop doors and ladders give the coop and run a really neat look. Having two pop doors and ladders can make for less competition for your chickens to access the coop. But it doesn’t seem all that necessary to have two.
One pop door and ladder is ample. It can placed on whatever side (left or right) you choose. One idea would be to keep the framing for the pop door that’s being eliminated and tack on some hardware cloth or chicken wire over the opening for added ventilation.
Ventilation
This design does not show ventilation built in on the sides. A few ventilation holes (around one to two inches round) on two sides will work nicely. Just remember to cover those with hardware cloth to keep birds out. The hardware cloth can be stapled over the holes from the inside of the coop. It can be stapled on the outside as well, but won’t look quite as nice.
Or, as we briefly talked about earlier, take one of the pop hole doors out of commission and simply add hardware cloth over the opening. You can actually leave the door attached, and shut it during cold weather!
Read more about the importance of ventilation in this article.
Other ideas for ventilation are adding a vent in the wall, or cutting out a small section of siding near the top. It can be about 2 inches x 18 inches and covered with hardware cloth or chicken wire on the inside.

Exterior wall vents come in many shapes and sizes. The one pictured above is one idea that will work great. It’s large enough so only one would need to be installed. It already has the screen built into it so no additional work is needed once it’s been put in.
For those of you living in a warm climate, a fan can be installed as well. These also work well in very large chicken coops.
Nest Box Hinges
The nest box does not show hinges so we included a diagram which shows two potential placements for them (see below)
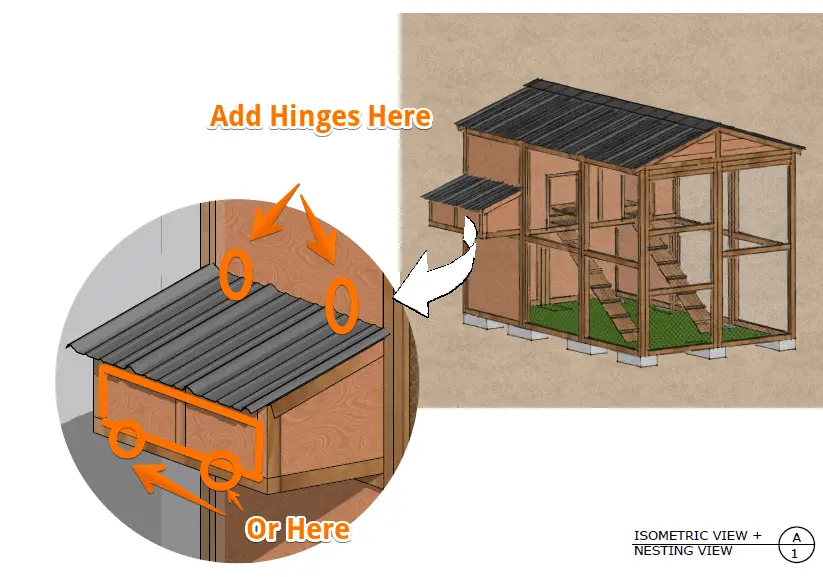
The top placement shows how it can be hinged to lift the metal roofed panel. This is a common way of attaching the nest box hinges. What can happen, though, is if the seam isn’t properly sealed off, rain can seep in. Backyard Chickens forum has a great solution for this.
By creating the rectangle shaped door under the roof line (as pictured above), this will help eliminate the issue. The hinges are installed at the bottom. This leaves the seam just below the roof line, keeping the rain away from it. This type of design is becoming more popular, and for good reason, as it is a more rain-proof solution.
Hardware Cloth Over The Run
Hardware cloth is a common material used when building a chicken coop. It’s great in that it’s rigid enough to keep out predators, yet light and flexible enough that it’s not too bad to install.
For this coop design, you’ll use a lot of it over the run. If your concerned about predators coming in under the coop, you can dig a trench and bury it around 1 foot below the surface of the ground. It’s a lot of added work but can provide peace of mind knowing your flock is safe.
The video above shows the basic process of attaching the hardware cloth to the coop. Hardware cloth can be purchased at your local hardware store or online.
Framing
The framing can be made with the lumber of your choice. 2×4 framing throughout will provide excellent stability. This would be our recommendation as it will be solid and better stand the test of time.
If you plan on making it mobile, however, you may want to consider using 2×2 framing. Our fear with using lighter lumber in general is keeping it from warping at the doors. With good bracing this issue can be eliminated.
Now if you’re really serious about the coop going nowhere, 2×6 framing lumber is also an option. This seems to be overkill, in our opinion, but it will DEFINITELY stay put once it’s built!
Final Thoughts
We hope this plan gets you excited to build your own chicken coop. It’s a challenging yet fun and rewarding experience.
This free plan, or others like it, can help save a few bucks which is always a plus! If this plan isn’t quite what you’re looking for, please browse our site for more free plans.
To see the complete list of our free plans, including this one, see this page. Thanks for checking out our site and best of luck to you in your chicken raising adventures!